

Overview of Exchange Server Backup Methods  Microsoft Exchange Server is a leading business-grade server system that offers email, calendar, contact manager, collaboration, and task management services, and is widely adopted across the globe. It is critical for companies that rely on collaboration efforts. As a result, it is very important that proper backup and recovery solutions are available in case of a disaster. In this two part series, we will use an MS Exchange 2013 setup on an AWS Windows 2012 server.
In this article, we will use an inherent backup mechanism offered by Microsoft, whereas in part two, we will explain how to perform backup with MS Exchange using AWS and Cloud Protection Manager (CPM).
Microsoft Exchange supports two types of backup:
What Are Online Backups?
Online backups are performed while MS Exchange services are running. They do not require any Exchange services to be stopped in order for backups to complete. There are three types of online backups available with Exchange: Normal (or Full) Backups: Backup your complete directory/Exchange store and log files. Restoration from a normal backup only requires a single normal backup.
Incremental Backups: Solely backup the portion of data that has changed since the last normal or incremental backup, then marks what was backed up so that it will not be backed up again. Restoring an environment from incremental backups requires the last normal backup as well as each following incremental backup. Only log files are backed up in an incremental backup, after which they are purged.
Differential Backups: Solely backup changes that were made in the directory or Exchange store after the last normal backup. Restoring an environment from differential backups requires one normal backup and the most recent differential backup. Unlike incremental backups, differential backups backup log files, but do not purge them.
What Are Offline Backups
By backing up Exchange files and folders while Exchange services are not running, Offline Backup software obtains access to database files and can therefore back them up. Planning offline backups can lead to consistent database files. Shutting down Exchange services in a controlled manner results in all transactions being committed to the database. The outcome is consistent databases that are labeled consistent or clean shutdown, according to your version of Exchange. Online Backups have a few advantages over Offline Backups. For example, with Online Backups, there is no need to stop your Exchange server during backup and they support backup scheduling.
Taking this into consideration, we will use an Online Backup for the sake of this article. In part 2 of this series, we will show you how Cloud Protection Manager, together with a Microsoft VSS utility, can help you achieve application consistent backups in Amazon EC2 environment. For this article, we will install the Windows Exchange backup utility and perform a complete backup and restore. You can configure your backup type while configuring the utility.
Installing and Configuring Your Backup Utility
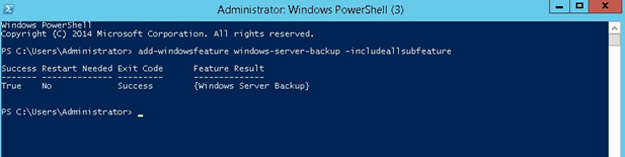
The Windows Server 2012 Backup features are not installed by default. To install the Windows Backup features: Log into the system with domain controller local administrator privileges or higher. Enter the following command from the PowerShell prompt: add-windowsfeature windows-server-backup –includeallsubfeature [enter]
In order to see if you successfully installed the backup features (as seen below), run the command from the PowerShell window.
Once you have installed the Windows Backup utility, you can perform the Microsoft Exchange server backup.
Backup an Exchange Server 2013 Using Windows’ Backup Utility
You can schedule an Exchange server 2013 backup using Windows’ Backup utility, but there are a few limitations:
- You can back-up the Exchange server 2013 database.
- You can only restore the full Exchange server database.
- You can’t restore individual user mailboxes
- You cannot restore individual mails
The following steps outline how to perform an Exchange database online backup using Windows’ backup utility.
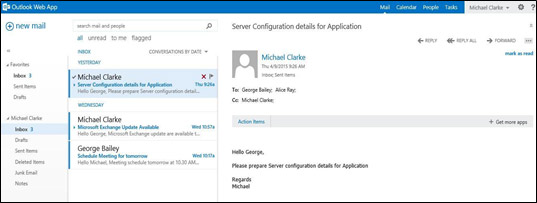
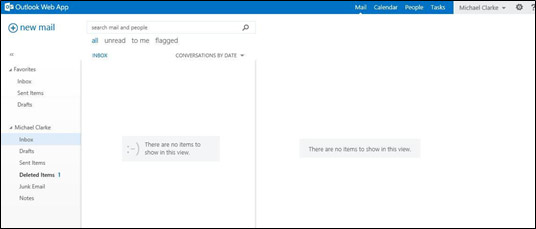
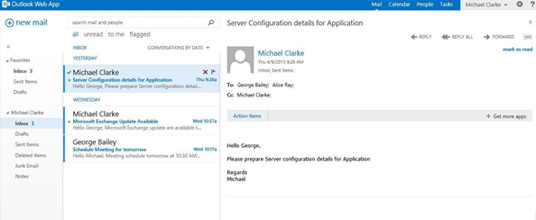
- Let’s start by looking at a screenshot of a sample inbox before running the Windows backup:
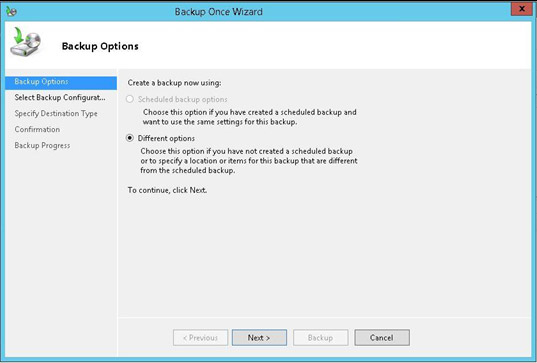
- Click on the Windows backup utility’s “Backup Options” page, then select “Different options” since this is an initial backup.
- Next, go to the “Select Backup Configuration” page and select “Custom” since only the C: drive will be backed up.

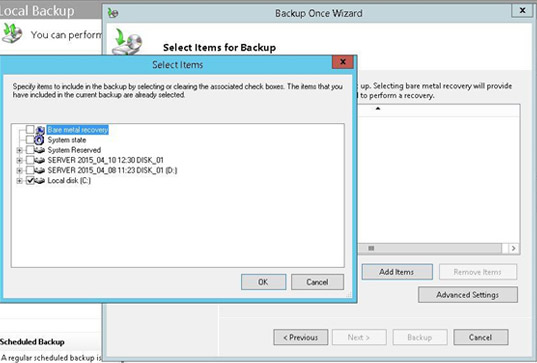
- Select C: drive on the “Select Items for Backup” page since that is where your Exchange database is located.
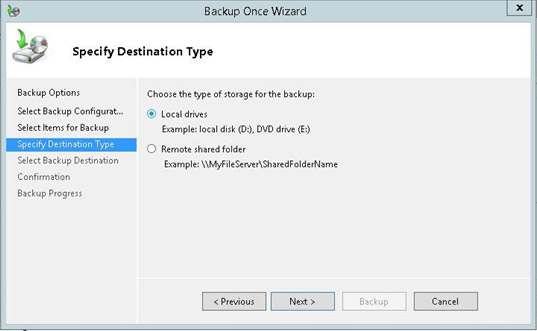
- Moving on to the “Specify Destination Type” page, select your backup’s destination: a remote location or local drive. Since the local drive comes from storage, select “Local drives”.
For a better fault tolerant application, your backup destination should be on a remote machine.
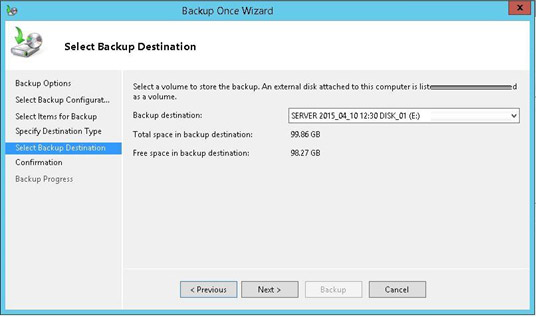
- Next, select the appropriate drive for your backup destination on the “Select Backup Destination” page.
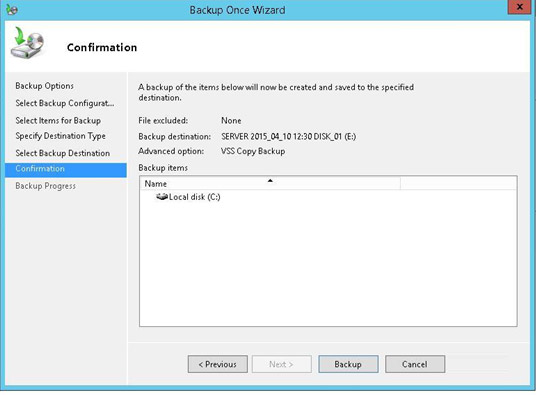
- The confirmation page then shows the details of your backup.
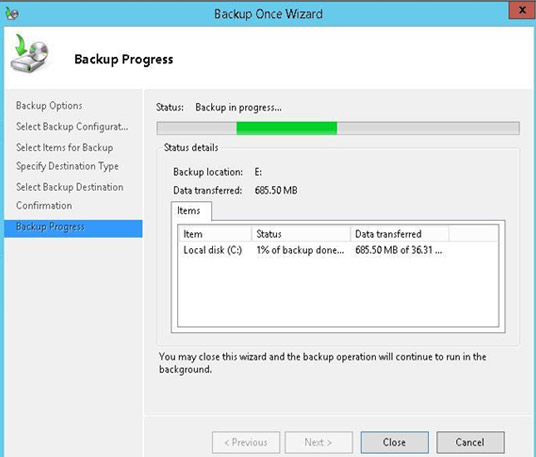
- You can see the status of your backup on the “Backup Progress” page.
After this process is complete, you can restore your backup at any point in time.
Restore an Exchange Server 2013 Using Windows’ Backup Utility
Having performed a backup with the Microsoft Windows server 2013 Backup utility, there is a risk that some of the data was accidentally lost. For example, returning to our sample inbox, you can see that due to an Exchange server outage, some of the emails from Michael Clarke’s inbox were lost:
By restoring the complete Exchange server, you may also be able to recover lost data.
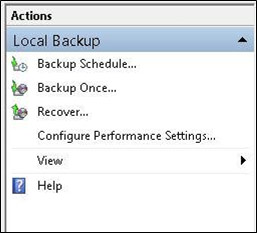
- Click on the “Recover” button on the action panel on the righthand side of the backup utility:
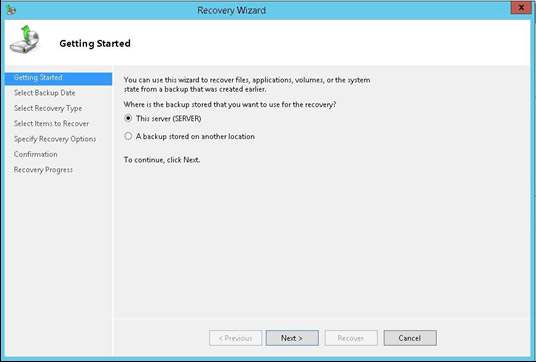
- In the recovery wizard’s “Getting Started” page, click on This server (SERVER):
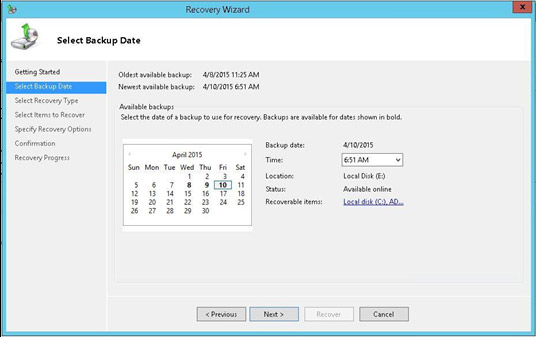
- Next, you will arrive to the “Select Backup Date” page, where you can select the most recent backup to restore:
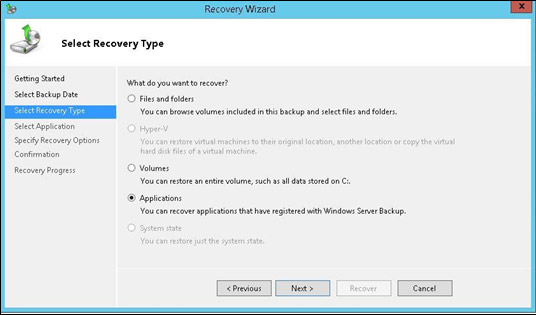
- The “Select Recovery Type” then allows you to select what you’re going to restore. In the case of our example, we’ll choose “Applications” since Exchange is considered an application.Note: If “Applications” is not an available selection, the backup you selected to restore is a folder-level backup, and not a volume level backup. When backing up Exchange data with the Windows Server Backup utility, backups must be performed at the volume level.
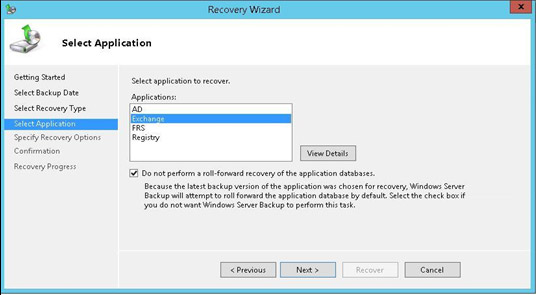
- The next page of the wizard shows Exchange in the list of applications to choose from. Select it to restore the Exchange database.
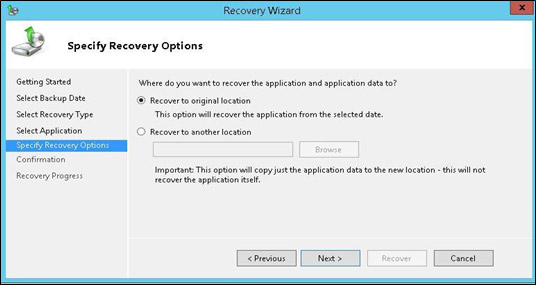
- The wizard then takes you to the “Specify Recovery Option” page, where you can choose exchange database recovery location. Select “Recover to original location” so the Exchange database will overwrite to see the lost data, or emails in the case of our example.
- The confirmation page shows you the details of the Exchange database restoration.
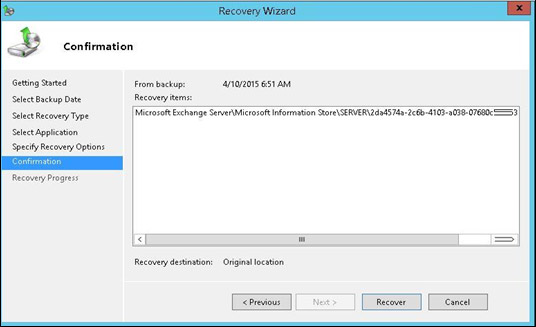
- On the confirmation page, click on “Recover” to start the recovery process. It will take time depending on the size of your database.
After the Exchange database restoration is complete, you can see that Michael Clarke’s emails can now be seen in his inbox:
In this article, we showed you how to recover Exchange server data using the Windows Backup utility. In production environments, it is critical to minimize your RTO (recovery time objective) so that after data loss, you can return to your complete environment as soon as possible. And if the need arises, you can automatically recover parts of your complete Exchange environment. If you run your Exchange environment in Amazon EC2, you might want the ability to recover to other AWS zones, regions or accounts. In the next article, we will show you how easy it is to perform backups in AWS using Cloud Protection Manager (CPM).
