
Amazon Lightsail basically lets anyone start his or her own website, including helping to create the cloud storage that the website will need. Normally we wouldn’t bother you with such a trivial purpose, but because of its nature, the Lightsail service has a fully exposed Easter egg: it enables developers to easily deploy pre-configured virtual private servers.
Separate from the AWS console, its clean and simple interface includes every element (such as a virtual machine, SSD-backed storage, DNS management, data transfer and a static IP address) needed to launch a project for a predictably low price. You can use the Lightsail console for managing its instances, or you can use the Lightsail API and Command Line interface (CLI). After creating an instance, a user can easily connect using an Amazon browser-based SSH terminal.
Who Uses Lightsail and Why
Developers can choose an image for their Lightsail instances that will start their projects instantly, eliminating the need to spend time installing necessary software and frameworks. Lightsail can help deploy and manage basic cloud resources, freeing individuals or developers to work on their personal projects. Developers can also learn how to use cloud services such as virtual machines or networking quickly using Lightsail. Lightsail has images for base operating systems, development stacks, and a lot of applications to choose from. We will discuss them later in this post.
Getting Started with Amazon Lightsail
You can create a virtual private server or Lightsail image for running applications like WordPress or development stacks like LAMP in almost no time, and can connect it to SSH without leaving Lightsail.
STEP 1: SIGN UP FOR LIGHTSAIL
If you don’t have an AWS account, sign up as follows:
- Open https://aws.amazon.com/ and select Create an AWS account.
- Follow the online instructions. Part of the signup procedure involves receiving phone calls and entering a PIN using the keypad on your phone.
If you have an account, then you can avoid this step and can go to the next step
STEP 2: CREATE AN INSTANCE
- On the Lightsail homepage, select Create instance.
- Select an application or an operation system from the displayed list

- Choose your instance plan. Lightsail plans start from $5 per month, which is available for free for one month.
- Set a name for your instance, and then click Create.
- (Optional) To configure advanced options, select Create a shell script that runs when you create your Lightsail instanceorCreate or upload a new SSH key pair.
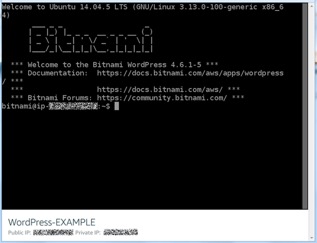
Your instance is now ready. You can connect to it via SSH, without exiting Lightsail.
STEP 3: CONNECTING TO INSTANCE
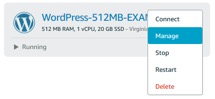
1. Open the menu on the right of your instance name, and then select Connect.
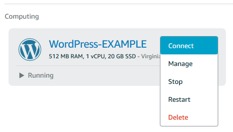
Tip: You can also connect by choosing Connect by opening the instance management page and choose Connect with SSH.
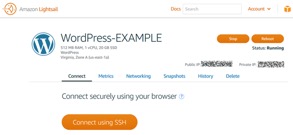
You can then type a command into the terminal and manage your instance without setting up an SSH client.
2. (Optional) Once connected to the instance, you can:
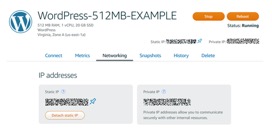
- Create a static IP address for your instance to keep the same IP address each time you restart your Lightsail instance.
- Create a snapshot of your instance as a backup.
We will talk a bit about these options now.
CREATE A STATIC IP ADDRESS
The next time you start your instance you will see that the default IP address has changed. To avoid this situation, you can create and assign a static IP address so that IP address remain the same every time you stop and start it. This makes it easier to manage DNS zones.
- Select Create other resources, then select Static IP on the homepage.
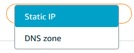
- Select the Lightsail resource where you want to attach a static IP address.
- Name the static IP address and select Create. Now, the static IP address is listed beside the region on the Homepage.
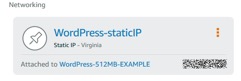
In addition, a blue pushpin appears next to the public IP address on the homepage’s Networking tab, indicating that the IP address is a static one.
Up to five static IP addresses can be managed at a time.
CREATE A SNAPSHOT
On the Lightsail homepage, from the instance menu, select Manage > Snapshots.
You can change the name of your snapshot and select Create snapshot. This helps save time in creating several instances using the same snapshot.
Lightsail Costs
Amazon Lightsail offers five different plans, ranging in cost from $5 up to $80 per month.
| $5 per month | $10 per month | $20 per month | $40 per month | $80 per month |
|---|---|---|---|---|
| 512 MB Memory | 1 GB Memory | 2 GB Memory | 4 GB Memory | 8 GB Memory |
| 1 Core Processor | 1 Core Processor | 1 Core Processor | 2 Core Processors | 2 Core Processors |
| 20 GB SSD Hard Disk | 30 GB SSD Hard Disk | 40 GB SSD Hard Disk | 60 GB SSD Hard Disk | 80 GB SSD Hard Disk |
| 1 TB Transfer | 2 TB Transfer | 3 TB Transfer | 4 TB Transfer | 5 TB Transfer |
SOFTWARE OF APPLICATION SUPPORTED BY LIGHTSAIL
Amazon Lightsail currently supports these operating systems and applications (with more to come in the near future). Operating systems in Lightsail
- Amazon Linux 2016
- Ubuntu Server 16.04 LTS
CMS applications in Lightsail
- WordPress powered by Bitnami
- Drupal powered by Bitnami
- Joomla powered by Bitnami
E-Commerce and project management applications in Lightsail
- Magento powered by Bitnami (eCommerce)
- Redmine (Project Management)
Development stacks in Lightsail
- LAMP Stack powered by Bitnami
- Node.js powered by Bitnami
- MEAN Stack powered by Bitnami (HVM)
- LEMP Stack (Nginx) by Bitnami
- GitLab powered by Bitnami (HVM)
Final Notes
The real shining point of Amazon Lightsail over typical VPS is a cloud backup service. Amazon Lightsail users can create a snapshot of the Lightsail instance for a small cost – $0.05 per month. Also, the API can be used to restore a AWS snapshot to a different instance type and re-assign a static IP address to that instance, making it possible to scale up or down an instance. Amazon Lightsail helps businesses grow and discover unlimited potential as 70+ AWS services can be connected to the Lightsail application using VPC peering. All these services can be managed from your AWS console while still keeping day-to-day VPS management in the Lightsail console.